Wednesday, 25 September 2019

Developing Students as Leaders of their own Learning - Facilitator: Shaun Hawthorne

Success Criteria: 
By the end of today we will:
• Understand what learner agency is and why it is important
• Identify different ways that we could better develop learner agency in our school/students
• Explore how we might embed learner agency across our school
• Explore what we might look for as indicators of learner agency

Agency is:
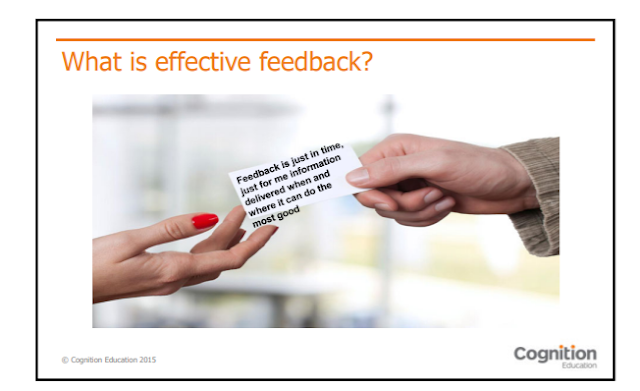
“The capability of individual human beings to make choices and act on these choices in a way that makes a difference in their lives”
“Cognitively, self-regulated learners plan, set goals, organise, self-monitor, and self-evaluate at various points while building new knowledge or skills.”
(© Cognition Education 2015)

What is ‘agency’?
Students have a sense of ‘agency’ when they feel in control of things that happen around them; when they feel that they can influence events. This is an important sense for learners to develop. They need to be active participants in their learning.
“One way of thinking of learner agency is when learners have the ‘power to act'When learners move from being passive recipients to being much more active in the learning process, and actively involved in the decisions about the learning, then they have greater agency.”
Derek Wenmoth
NZC Online – TKI Learner Agency Webpage 

What should teaching and, most especially, learning look like in this rapidly changing world?
Preparing for their future
● Critical thinking
● Creativity
● Metacognition
● Problem solving
● Collaboration
● Motivation
● Self-efficacy
● Conscientiousness
● Grit or perseverance

Global Competencies 6Cs: Character, Citizenship, Collaboration, Communication, Creativity, and Critical Thinking.
Research links learner agency with:
● Increased motivation and ownership of learning
● Increased emotion in learning and therefore engagement
● Increased neural development (through active learning)
● Greater differentiation
● Increased sense of belonging
● Increased likelihood to continue in schooling
● Increased achievement


Key questions learners need to be able to answer to own their own learning:
Where am I going?
How am I doing?
Where to next?
What do I need to know and do to get to where I want to be?
How will I know when I’ve succeeded?
What support and resources do I have access to to help me get to where I want to be?
“Teaching students how to learn is as important as teaching them content, because acquiring both the right learning strategies and background knowledge is important – if not essential – for promoting lifelong learning.”
Dunlosky, 2013


What are learner dispositions?
Dispositions are frequent and voluntary habits of thinking and doing. (Da Ros-Voseles & Fowler-Haughey, 2007).
A disposition is the way we would naturally respond to a situation or experience (Carr, 1997)

Developing learner dispositions
What?
• What will students learn?
• What do I need to teach?
• What are the skills needed to develop this disposition?
How?
How will I make the dispositions part of classroom life?
• How will I teach the skills needed to develop each disposition?
• What strategies or approaches will I use?

How to sustain and embed these changes?
Develop routines that build your learner dispositions, processes and strategies.
These routines should be:
 Explicit – catchy names, easy to remember
 Simple – only a few steps
 Repeated – use over and over
 General – can be applied in many contexts.

Ritchhart, Perkins, Tishman 


The purpose of feedback is to close the gap.

A few key messages from research
Seven elements of effective feedback
1.Goal referenced
2.Tangible and transparent
3.Actionable
4.User friendly
5.Timely
6.Ongoing
7.Consistent
From article by Grant Wiggins -2012 

Future focuses for my class and school:

Make own visual for the Learning Pit and strategies for what to do when in the pit. Students will then have the power and the language to solve their problems.

Creating visuals and colour coding to help key the learners as to what they are doing within the learning process.

A graduate profile or learner profile that has the language that is shared. What do we want our students to know, think and do when they leave our school?

Do we teach children how to learn?
How do we teach students “how to learn”? 
Learner Self questioning to develop efficacy:
 What knowledge do I have to help me solve this?
 What tools can I use to help me solve this?

Friday, 13 September 2019

Growth Coaching Course - Facilitator: Deanna Johnston

This was a two day programme. 
During these two days I:

  • was introduced to the GROWTH coaching system;
  • explored the GROWTH model;
  • applied some of the 8 key coaching skills;
  • gained an understanding of the Coaching "Ways of Being" for coaching conversations;
  • saw modelled and applied the GROWTH coaching model to a range of conversations;
  • developed next steps for taking coaching forward in my kura
GROWTH model:
(Relationships)
G - Goals
R - Reality
O - Options
W - Will
T - Tactics
H - Habits
(Results)

Good coaching conversations lead to...
A - Actions
C - Clarity
E - Energy

8 Key Coaching Skills:
1. Developing trust
2. Being present
3. Listen actively
4. Clarifying
5. Empathising
6. Being succinct
7. Asking the best questions
8. Giving feedback

Let those "white spaces" (silence) rest - it allows the coachee to process their thoughts. 
A major component is your emotional intelligence and "way of being".

Coaching is achieving goals:
  • Where are you today?
  • How will you get there?
  • Where are you going?
Existing goals → Motivation/Strengths/Environment→Desired State "Future Perfect"

Coaching is about:
  • seeing talent (strengths, potential) in everyone; solution-focused vs focusing on problems;
  • expanding people's frames of reference vs allowing them to remain fixed (deficit theorising);
  • seeing new possibilities vs setting tasks;
  • asking (developing) vs telling;
  • working WITH difference vs trying to change people;
  • giving honest, constructive feedback vs feeling frustrated by avoiding the 'real' conversations.
Effective Listening
Active Listening Attitudes
  • being "present" mindset
  • avoid 'me too';
  • remember that you think faster than peole can speak;
  • listening for content and feelings.
Active Listening Behaviours:
  • eye contact (appropriate);
  • open posture;
  • minimal encouragers;
  • probing/clarifying questions or responses.
Have a go - Problem Talk
  • Tell me about one of your small work challenges at the moment;
  • Why is this such a problem?
  • What are the worst emotions you have around this?
  • what are the road bumps to progress here?
Have a go - Solution Talk
  • tell me about what you'd like to achieve in relation to this?
  • if this was working well, what would be happening?
  • can you think of a time when you handled this situation successfully?
  • what would others notice you doing if you were managing this challenge?
  • if you could take just one single action to move this forward, what would it be?

Concerned-based feedback reminders:
  • talk with people not at them;
  • the more emotionally loaded the subject, the more silence is required;
  • use silence to slow down a conversation so that you can discover what the conversation really wants to be about.

I would thoroughly recommend this course to anyone wanting to help and support colleagues.
My future perfect would be our entire teaching staff to attend this PD so we have a shared understanding and knowledge in order to be on the same waka.

Thursday, 12 September 2019

DFI Get Together #2

This was the second get together from DFI intake #1, 2019. Cheryl Torrie (Manaiakalani facilitator), kindly came along again to help us continue to develop our class sites. Once again, it was such a worthwhile couple of hours spent tweaking, learning, creating and sharing. I was able to reorganise a few pages and add a Teachers Notes button so that I can record my anecdotal notes, curriculum links and teacher reflections. We had an interesting conversation around the curriculum links; they are already evident in my Learning Intention so why am I having to also show where it's in the NZC again? This Teachers Notes button is only visible to me.
My class site is still in its baby stages but I feel a lot happier about the direction I'm heading. I also loved the opportunity to listen to what other schools are doing. Thanks to Sherryl Gomm and Cheryl Torrie for your ideas, creativity, knowledge and professionalism.

Wednesday, 11 September 2019

Predator Trapping workshop - Trap Lines and Trap Types

I applied for a grant to Tairāwhiti Enviroschools and Eastland Port so our school could purchase Goodnature's A24 and A12 traps. As part of receiving the money, I agreed to attend a trapping workshop.
As my class have done quite a lot of study around different types of traps, a lot of the information around the traps was not new but it's still quite fascinating. It was also interesting hearing about the traps that are set in our reserves.
The Norway rat has a short, thick tail which is shorter than its body and it has small ears. The ship rat has bigger ears and a tail that’s longer than its body. The ship rat is the biggest threat to wildlife because it’s a good climber and can reach nests in trees. The Norway rat is big enough to attack seabirds, but it’s not a tree-climber and can only attack wildlife that lives or nests close to the ground. Kiore, our native rat, are not thought to be around Gisborne and are more commonly found on the outer islands. We think we are catching Norway rats at school. Tonight, I learnt that one variety of rat likes bacon so it's a great lure but I can't remember whether it was the Norway or ship rat! We have always used peanut butter.
Stoats were introduced to New Zealand in 1884 to control rabbits and hares. Scientists and bird-lovers warned that they would be a danger to our native birds, but their warnings were ignored. Of course, the stoats worked out very quickly that it was much easier to catch a kiwi or other native ground nesting birds than chase after a rabbit or hare. A big problem with stoats is the size of their families. A mother stoat can have up to 12 babies at a time, but usually has 4-6 babies. A female stoat can get pregnant when she is still a blind, deaf, toothless baby – at only 2-3 weeks old. Even though she is pregnant, her babies won’t grow inside her until she is an adult. They will be born the following spring. If there is not enough food around, the pregnant female can delay the birth of her babies until more food is available.
The Trapinator is a simple and effective way of trapping possums. It is an all-in-one spring-set kill mechanism in a plastic box and is mounted by screws onto trees, 1 m above the ground. You could also use the leg hold trap or Goodnature's A12.
Some people at the workshop were interested in live trapping. The purpose of this is to ensure you are not killing antibody's pet. The Dog Control Officer will come and get any wild cat you catch in your live trap We were unsure if they would take away a possum.
You can hire a variety of traps at the Tairāwhiti Environment Centre.

Tuesday, 20 August 2019

Manaiakalani Staff Meeting -SHARE

Today's P.D. covered aspects that I have written about previously during my DFI journey.

How has sharing changed over the years?
I remember being on my year long O.E. and my parents were not concerned that they hadn't heard from me in 4 months. Although I had sent numerous postcards, they hadn't arrived. Nowadays, sharing is instant whether it's via text, Facebook, facetime or email. It can also reach a lot more people instantly.

We share:


Blogging is a great way for our students to connect to an audience as it's free for them. Tuhi mai, Tuhi atu allows the students to blog to an authentic audience. They receive comments and feedback about their work from a buddy class.

Summer Learning Journey - negating the summer drop-off.
Not only does blogging 2+ times a week improve students writing, it also has a positive effect on their social and emotional well being as they have positive contact with the educators over the summer holidays. It also builds their confidence and establishes a sense of belonging online. Imagine what the impact would be if the students are blogging 2+ times a week in a classroom with a teacher.

The blog posts in the Tairāwhiti Cluster are connected to a Twitter feed. The learners themselves are not on Twitter; their link is there. Some people are embedding the Twitter feed onto their class site. 

Thursday, 8 August 2019

DFI Get Together

Three of us from DFI intake #1, 2019, decided to get together and share ideas about our class site. Cheryl Torrie (Manaiakalani facilitator), kindly came along too, to help us with the wrinkles we needed ironing out. It was such a worthwhile couple of hours spent tweaking, learning, creating and sharing. I was able to reorganise a few pages, redesign my Reading slides for next week and change my theme. Cheryl also showed me how to use Hapara Dashboard to check student blogs.
Although my class site is still in its baby stages, I feel a lot happier about the direction I'm heading. I also loved the opportunity to listen to what other schools are doing. Thanks to Sherryl Gomm, Robyn Shaw and Cheryl Torrie for your ideas, creativity, knowledge and professionalism.


From...
to...

Thursday, 1 August 2019

Pimp My Site

WHY: 
Learning how to create a site to lead learning.
Time to improve my site.
Sharing your good practice.

After exploring sites, I came up with a PMI:


At the moment, the things I am addressing on my own site are:

  • students turning in work so I can access it easily
  • planning - at the moment I am planning on paper (I was doing it on a google slide but found it difficult to show differentiation. The template I created was not good enough. I also found it difficult to put anecdotal notes on whilst teaching - I had post-it notes everywhere!)), planning for the students to see on my class site (they don't need to see everything) and writing it up in modelling books. It's too much and too time consuming.
  • showing Maths on my site - I run workshops as well as have 'groups' for tasks/games. I can't work out how to put it all on my site and not have multiple clicks for the students to be where they need to be (2 clicks is my self-imposed limit).
Scrolling through other people's sites has answered some of these questions. I need more help with planning on a google sheet, hiding tabs for students (but not me) on that planning so it can go directly onto my site, creating a turn in sheet for the year. I know we covered that last one in DFI but I can't remember how to do it and the rewindable slides no longer make sense. Maybe they will when I'm feeling more 'refreshed'!

As always, Cheryl Torrie, Herman Fourie & Amie Williams were very patient and full of great advice. They all said to just concentrate on one thing and do that. The trouble is I don't want to crawl, I want to fly (now!).

Note to self: a tip from Herman - check out Tall Tweets (select presentation...) 


Monday, 24 June 2019

Writing Feedback - Kath Jones

Discussions around guided writing, shared writing, interactive writing, independent writing and modelling/think aloud approaches led to the staff brainstorming answers to the questions:
Why would I choose to use this approach? Why is it a useful approach to have in my kete?
What impact does the approach have on learners? What do I do when I am using this approach? What do the students do?
We still need to think about the language experience approach as well.
Writing Planning that shows differentiation between the groups was also discussed. Here's a Junior Class sample:
Senior Class sample:


Thursday, 6 June 2019

Google Hangout - Reading in a Digital World

What does effective practice look like in a Digital World?
There is no easy answer - we are co-constructing a design where effective teacher practice is amplified and turbo-charged by the engagement and affordances of technology.
Dorothy mentioned that the Woolf Fisher data shows although students are making vast improvements in Writing, this is not the same in Reading. The question is, why not?
I think it is important to remember (and Dorothy also mentioned this) whatever you do, your classroom reading programme MUST reflect effective practice and for this we can't go past the Effective Literacy Practice handbook and The Literacy Learning Progressions. Our DATs (deliberate acts of teaching) need to be at the forefront:

  • Modelling
  • Prompting
  • Questioning
  • Giving feedback
  • Telling
  • Explaining
  • Directing

We are looking at ideas to SUPPORT effective practice, as well as the amplify and turbocharge elements of our reading programme in any learning environment or context, and in a digital learning environment. 


Engaging with the text should not be limited to just the written words. Teachers should be harnessing different elements of the text and the digital to scaffold opportunities for higher-order thinking and improved critical thinking and analysis skills. 
How can we do this? We need to shift the locus of control from the teacher to the students. Here are some ways:
  • Voice Typing - get the learners themselves to transfer the text from print to digital; read texts aloud- daily using voice typing; gamify using Word Count within set time; use one doc per… week?... term? ...text; edit and correct by comparing to the print text;
  • Google Keep - use the photo option to ‘rip’ the text;
  • Oral fluency - Read texts aloud- daily using Screencastify; listen to and reflect upon fluency; think about how you can show punctuation orally; do your facial expressions change how the text sounds?
  • Create a Photo Journal in google docs;
  • provide multimodal opportunities where every learner is able to access the text, students are being hooked in through the text style that engages their learning style/capability/orientation/x factor (this is also mentioned in an earlier blog DFI Day 6).
Learner selected text is a valued component of a text set. Empowering our learners is vital to the Manaiakalani kaupapa and the Literacy Learning Progressions. Here's a variety of suggestions for learners to record their self-selected text:
  • Google Form- may be least engaging BUT the most functional (sorting, sifting organising);
  • Padlet- variety of options for recording information;
  • Flipgrid- engaging BUT more time consuming for teachers to look through and retrieve information from.
And if you're having trouble with students wondering off on a different tangent, use Hapara for set (limited) periods of time to ensure they stay on task. Watch tutorial here (26m 30 start point. New updates to layout are not reflected).
Now the teacher can use technology to ‘insist’ that the learners focus on reading a specific text for a defined length of time. This could be a group or the whole class, depending on age/level/context. This supports an important element of a successful multi-modal teaching design.

Other ideas to use:
  • The Final Word Strategy
  • Give one, get one
  • The Negotiation Game
  • Summarising in your own word (20 words max)
  • Say it grids
  • Deep dive into text
The ‘big six’ - catalytic digital teaching capabilities:
  • Ambitious outcomes for all;
  • Eyes on text;
  • Language and vocabulary development;
  • High level discussions;
  • Transforming and transference of knowledge through creation;
  • Making thinking visible.
Valued Learning Outcomes:
  • Able to read and comprehend unfamiliar, age appropriate, texts independently  
  • Develops reading ability at an at least expected rate of progress 
  • Reads regularly in and out of school 
  • Loves reading
  • Has strategies for selecting texts for particular purposes 
  • Knows that some texts will require resilience and persistence to make meaning from
  • Has a toolbox of strategies that s/he can use deliberately
  • Can synthesise across multiple texts
  • Considers connections between oral, written and visual language
  • Can read critically and is hyperaware of authors’ positioning of readers
  • Appreciates aesthetic properties of language and literature
Any other ideas you have would be greatly appreciated. Please add them to the comments below.

Tuesday, 4 June 2019

Today's Google Hangouts - Google Tour Builder Basics & Template Treasures

Google Tour Builder is a way to show people the places you've visited (or want to visit) and the experiences you had along the way using Google Earth. It lets you pick the locations right on the map, add in photos, text, and video, and then share your creation. 
Your tour is private by default. Once you've finished your tour, just click "share tour" to share it with your friends, family, students or make it public for anyone to see. You can go back and edit your tour on the map: add pins, delete pins, make pins private, etc. You can also go back and mark your tour as private after sharing it. 

There are numerous ways I could use this in my classroom:

  • Reading groups - because I can add text, I can make sure it is at the correct reading level for my groups.
  • This could be linked into the students Inquiry. Recently, groups have been reading and researching the following:


 By using Google Tour Builders, they could have presented their findings in a different way.

And of course, this could be linked to the Carmen Sandiego Google Earth Game. So many ways to use this!


Template Treasures
Instead of reinventing the wheel, there are many templates already provided in docs, sheets, slides and forms. You can use these and create your own for use later.
Why use templates?

  • Provides ideas as a starting point 
  • Makes documents look professional and branded
  • Helps for understanding of style, layout and design features
  • People like you have created these templates for real-life situations, so you should be able to find something that fits your needs
  • Saves time and avoids errors because you are not creating from scratch
  • Organisation by category makes searching easy
  • Some come with add ons that give extra functionality

Notes:
If you don’t want the templates appearing - in template section click on Main Menu, settings and unclick box “Display recent templates on home screens.”
You can’t save it as a template if the original doc has been created outside your organisation.
Remember to ‘Submit a copy of this file instead of the origina.l’
Generally, everyone in the domain gets access to the same template gallery.
Can change user settings and create custom categories if you have admin rights to do this (G-Suite admin console search ‘templates’ and select Drive).
You can turn off access to custom templates but not to the Google-provided templates.


Friday, 17 May 2019

DFI Day 9

What did I learn that increased my understanding of Manaiakalani kaupapa and pedagogy?
Learning is ubiquitous - anytime, anywhere, any pace (from anyone - we can bring in experts etc). 


It empowers our learners as their learning is not restricted to being in a classroom. Having had three students take extended overseas holidays during term time, I have seen them access my class site to keep up with their learning.


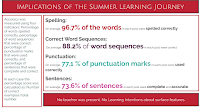
Summer Learning Journey's have proven that those who did 3 or more blogs a week during the summer holidays improved the most. Tasks did not need Learning Intentions or require surface features yet students improved in this area.

Rewindable learning is something that I am very keen on implementing more and more. It means it's not just the ones who can remember what to do who can then help others. The ones who are using rewindable learning are able to help as well; they have the opportunity to review the lesson as many times as they need, and can then go and help others. That's very empowering for them.


And on that note, here's some ideas to help me:


(+video notes on YouTube)

What did I learn that could improve my confidence, capability or workflow as a professional?
Yesterday I received a tattoo (temporary) during staff prayer time. I applied it to my wrist - unfortunately upside down!! It says "Head up, wings out." Every time I look at it, it makes me smile for the simple fact that it's upside down! The timing was perfect as it resonated with me all day - to me it says, "Keep going, take flight, you can do it!" And I am. My confidence blooms, then takes a hammering. My capability improves then I find I can't do something digitally, but google saves me. My workflow gets better and then I want to do something different so the new learning slows me down. This is all part of me as a learner AND a professional.


What did I learn that could be used with my learners? 
Rewindable learning is an important idea I need to keep at the forefront when planning. Getting experts in (via hangout, YouTube clips etc) will engage student learning further.

What did I learn that could improve my confidence, capability or workflow in my personal life?
Head up, wings out - I've got this!

Friday, 10 May 2019

DFI Day 8

What did I learn that increased my understanding of Manaiakalani kaupapa and pedagogy?
'Empowered'

Firstly, let's use the word 'empower' instead of 'agency'. The word 'agency' often has different connotations that we don't want attached to digital technology. After all, what comes to mind when you hear the word 'agency''??
Unfortuntely I missed the first 10 minutes of today's google hangout with Dorothy Burt due to my internet dropping in and out, but she reiterated the fact that the use of digital technology should redefine the way we learn and give experiences to children that they wouldn't otherwise receive. Digital technology has the power to transform children and the communities they live in. 
Dorothy took us on a tour around the community she worked in. It reminded me of my early teaching days in Waipukurau. It was the same situation she showed but for different reasons: transient students, low income families, decile 1 school.  Studies have shown these decile 1 school children hear 32 million words less than decile 10 students by the time they start school. The idea of 5+ a day takes on new meaning; if we can create a learning environment that allows students to engage in conversations that have at least 5 iterations, it will improve oral language, reading and writing skills. How can we do this? Sit in a circle and have a table tennis conversation with a minimum of 5 interactions between students. Blogs also give the students the opportunity to do exactly the same. Blogs are not just about posting and sharing - they're also about the discourse through commenting that connects our students to the art of conversing. This has shown to accelerate learning.


"Hand in glove", "salt and pepper", "fish 'n chips" - these just go together:


What did I learn that could improve my confidence, capability or workflow as a professional?

I created a google hangout (no way would I have ever had the confidence to do this two months ago!) with two teachers from Auckland, Chantal from Panmure Bridge School and Susan from Glen Taylor School. It's always so lovely to connect with others and hear their learning journey.
Going through the Digital Technology progress outcomes and leveling them with e-learning/ICT capabilities showed that you can’t equate the progress outcomes with year levels. Like anything, it depends how much the activity is scaffolded as to which progress outcome it falls under.

What did I learn that could be used with my learners?  
Tasks need to include problem solving, debugging, perseverance and resilience.


Algorithms are a step by step process in which students need to create, test and revise. Peseverance (through debugging) builds resilience in our students.  As Albert Einstein said, “It’s not that I’m so smart, it’s just that I stay with problems longer.”
Our session on computational thinking at Mindlab was great fun. The programmer, tester, robot activity we did is something I have done with my class but it was hilarious being the student again. I loved the creative and smart thinking I heard ("First, take your blindfold off," was a classic). This activity was scaffolded:

  • first, just let them do it!
  • next time “How much talking did you do? Remember only the tester can talk!" Try again and swap roles. Tell them to think about the programme - set parameters at the start e.g. all turns will be right hand ¼ turns. For littlies just use arrow cards.
  • then 3rd time switch programmes with another group and trial theirs. You can't change the langugae they used e.g. 1/4 right turn to 90 degrees right hand turn.

Students can co-construct the perimeters.

Lightbot - free app (for iPads. I using a chromebook - tweak your flash). Note to self - this was rather addictive!

Co-spaces - coding programme for students. Students can create their own story. Great to set a quick task e.g. create two characters, name them within specified time limit, then move onto someone elses creation. Set next task then move to someone elses masterpiece etc. This means the students aren't getting too attached to their own story and are also getting ideas from others. Try not to show too many of the elements co-spaces can do - let them explore and discover for themseves then teach each other.

What did I learn that could improve my confidence, capability or workflow in my personal life?

In all apsects of my life, tasks include problem solving, debugging, perseverance and resilience! Just go with it and enjoy the ride!

Tuesday, 7 May 2019

Writing - Janet Craigie

 How beginning writing was scaffolded in the 1960s and 1970s.
The writing in that time was creative in the sense that it stemmed from the child's own dictated sentences - a precursor to composing.
Steps followed:

  • Trace letters and words
  • Copy letters and words
  • Order or sequence letters in words (left to right direction)
When tracing or copying their own dictated sentences, children were supported to:
  • Order or sequence words in sentences
  • Visually scan and analyse letters in words
  • Say and analyse words into sounds
  • Say and analyse sentences into words. (When the re-read as the write.)
At the same time, there was explicit handwriting instruction. This instruction and the intensive practice of letter formation supported children's acquisition of letter knowledge that could relate what they were doing in writing to what they were doing in reading - RECIPROCITY between reading and writing.
When using this method, it helps if beginning writers work in a blank book. This allows them to draw before writing - the older writer's "mind map".
The drawing gives a physical representation of the theme for dictation.
A simple instruction, "Tell me about your picture," gives the child the opportunity to make a statement about the picture, which the teacher can then scribe onto the facing page. In large, clear, well-proportioned script. In pencil. The teacher is the demonstrator of the act of linking something said to something written. The child and teacher then read the script together, the teacher helping the child to word match as the reading happens.
The child is then required to trace over the pencilled script with a strong coloured felt pen. At the very beginning, this process needs to be closely supervised for:
  • Pencil grip
  • Starting point and direction
  • Letter formation
A read back on completion allows the dictated text to become more secure and may elicit additional dictation as the child becomes more confident.
The task is complete when the child writes his/her name under the writing.
This process needs to continue until the child shows that he/she is tracing confidently, pen strokes are firm, letter starting points are consistent and the tracing is done with ease.
The child can then move to copying under the teacher's script, written in pen, and from there to copying from a child dictated script on a separate piece of paper.
At the end of this process, a firm foundation has been laid for learning to write for oneself, and beginning to take more responsibility for problem solving - the "haring and recording sounds" method of teaching writing.
How long does this take?
There is no time limit on any of the ways of working.
Observations of how the child performs in each way of working determine moving on.
As written above, the child must be confident, the production must be secure, and the child must be working with ease.
It is critical that opportunities for writing in the handwriting sense as well as the dictating sense happen daily.
The child needs to know specifically what you are valuing and needs to be praised for appropriate endeavours. (Not excessively - words like "awesome" and "wonderful" are overused,) Praise can be, "Your tall letters are really tall today."
(Thanks to Janet for these notes.)

Friday, 3 May 2019

DFI Day 7


What did I learn that increased my understanding of Manaiakalani kaupapa and pedagogy?
Enabling Access

Through a google hangout with Dorothy Burt, we were reminded of and learnt many new things about the importance of connecting with our students.
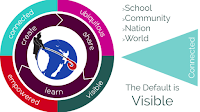
  • Connecting with Manaiakalani provides a powerful network for teachers and students;
  • Connectivity is a way of life for our students. Take it from them and they will check out.
While face to face will always be a major component for students to interact with people in their daily lives, it's a big world out there with fabulous digital learning opportunities for our tamariki to learn and grow from.
One thing that really stood out for me is that making learning visible for our students is crucial. Having had four students this term take extensive overseas holidays, when asked today at DFI, "Can they see it from Starship?" I was mortified that some parts of my class site weren't. An easy fix but something I need to be more aware of.

Tuhi Mai Tuhi Atu (write to me, write to others) is a fantastic way for students to connect with others across the world. Using a shared language ensures everyone understands the kaupapa.


The pedagogy programme is designed around the learn, create, share model. In Term 1, the students focus is on learn, Term 2 is create, Term 3 share and in Term 4 they are doing are all 3.


And of course...

What did I learn that could improve my confidence, capability or workflow as a professional?

My class site is about to be turbo-charged with all the fantastic ideas we were shown today. I really enjoyed viewing other class sites to see what worked for me. [Herman Fourie's, Room 6 Wesley Primary School and Miss Ferguson's are very inspiring - one day mine will look like that! (apparently not a SMART goal for me at the moment!) Hehe!]
I like bright colour, simple to use, theme based, and with as few clicks as possible (ideally two but I seem to need 3). But what do my students like? This is something I'm going to follow up and ask them, then act upon.
We were given the opportunity to give our sites another kick start - once you start, it's rather addictive. I didn't use my snipping tool to take a 'before' shot but's here's the current look which will be further amplified over the weekend.


My snipping tool didn't let me show the whole page but you can see where I'm heading. Once all the pages behind the buttons are finished over the weekend, I'll publish it ready for next week.

What did I learn that could be used with my learners?

  • Making my site more user friendly with as few clicks as possible to get to today's learning;
  • Remove the Term 1, 2, 3, 4 buttons (I actually archived this on the toolbar). Replacing them with group buttons means it's one less click;
  • Scaffold the ways students can get to where they need. I know some of my class like the toolbar at the top, but others who are more visual learners prefer buttons on the homepage;
  • I need to make my tasks more multimodal - this has been an ongoing focus for me throughout the year;
  • Check my site through an incognito tab. I have asked our administrator to turn it on for our school domain.
What did I learn that could improve my confidence, capability or workflow in my personal life?

I find I am continuosly adding to my digital kete and gaining more confidence in what I do. Occasionally, I even feel confident to show another adult what to do! Working more within my class site means I don't need to be at school to plan etc. This makes it far more flexible for me in my personal life.